Blog · · Andrii Shylenko
Review your drawing before downloading it
Choose how dimensions appear, tidy up a label, and download your drawing. Here is the whole workflow in Studio.
1. Open the drawing
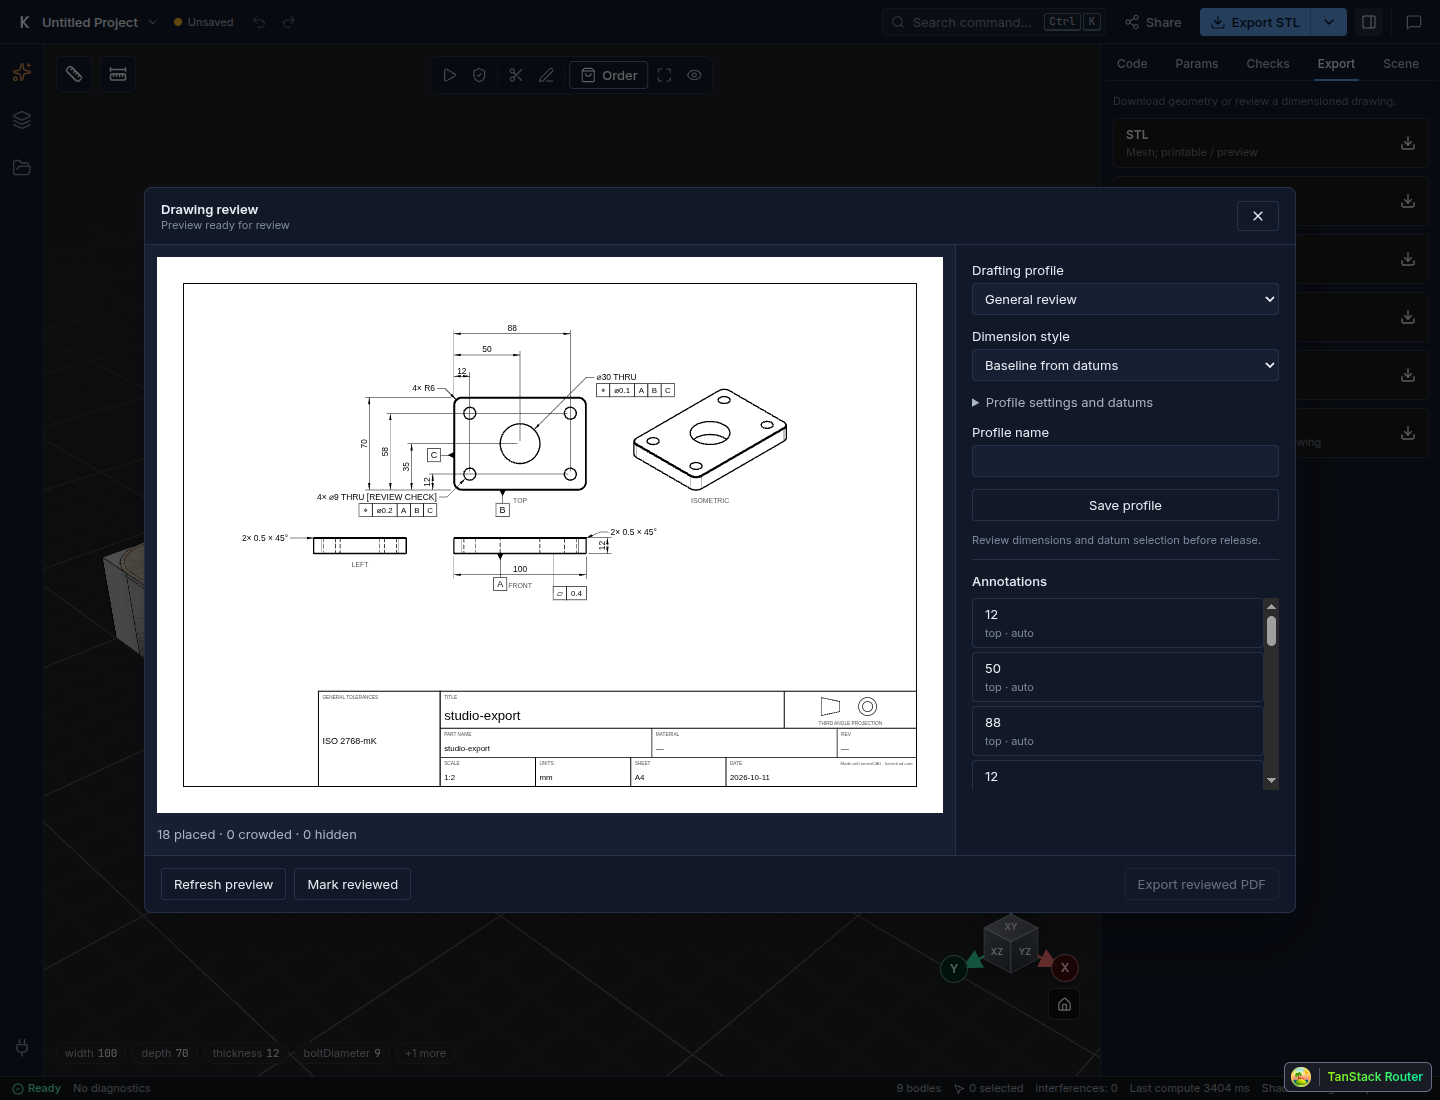
Open the mounting plate in Studio, or use your own part. In the right-hand Export tab, click Drawing (PDF), then Generate preview.
2. Choose a style
Use Dimension style, then Refresh preview. These three drawings show the same mounting plate.
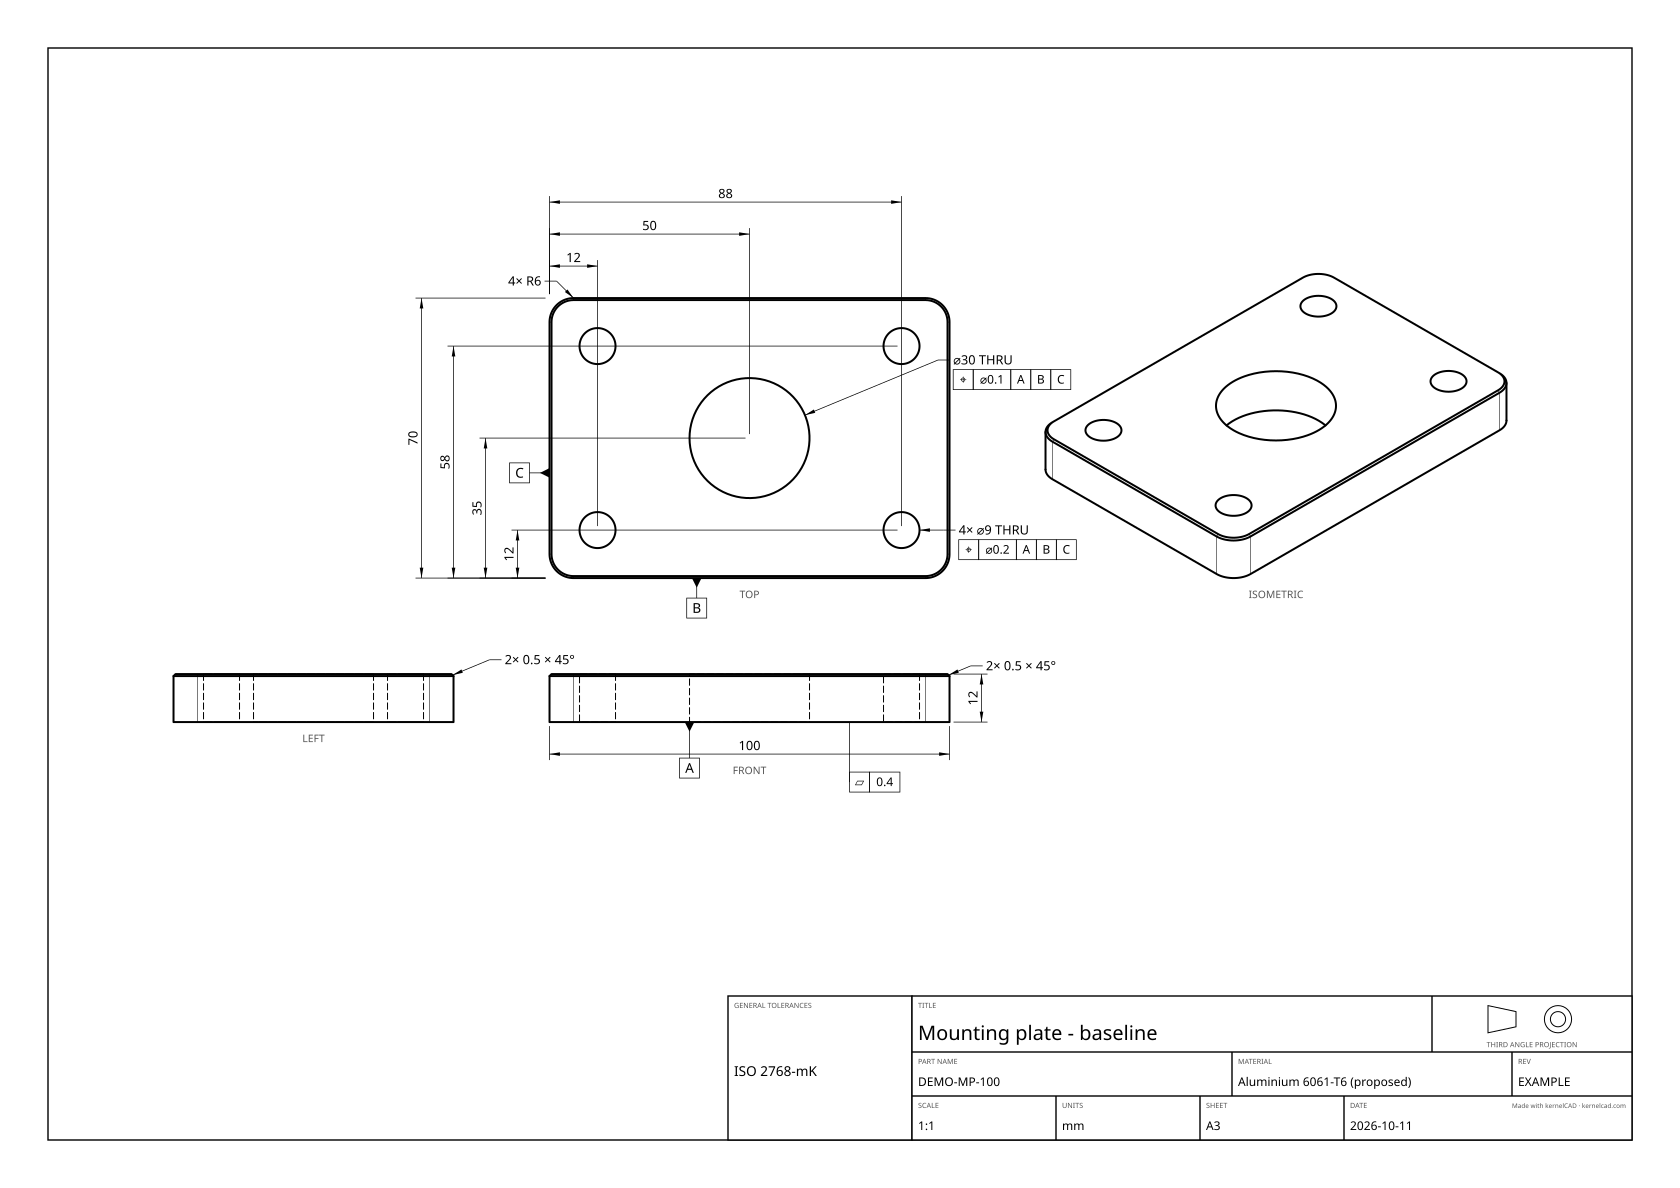
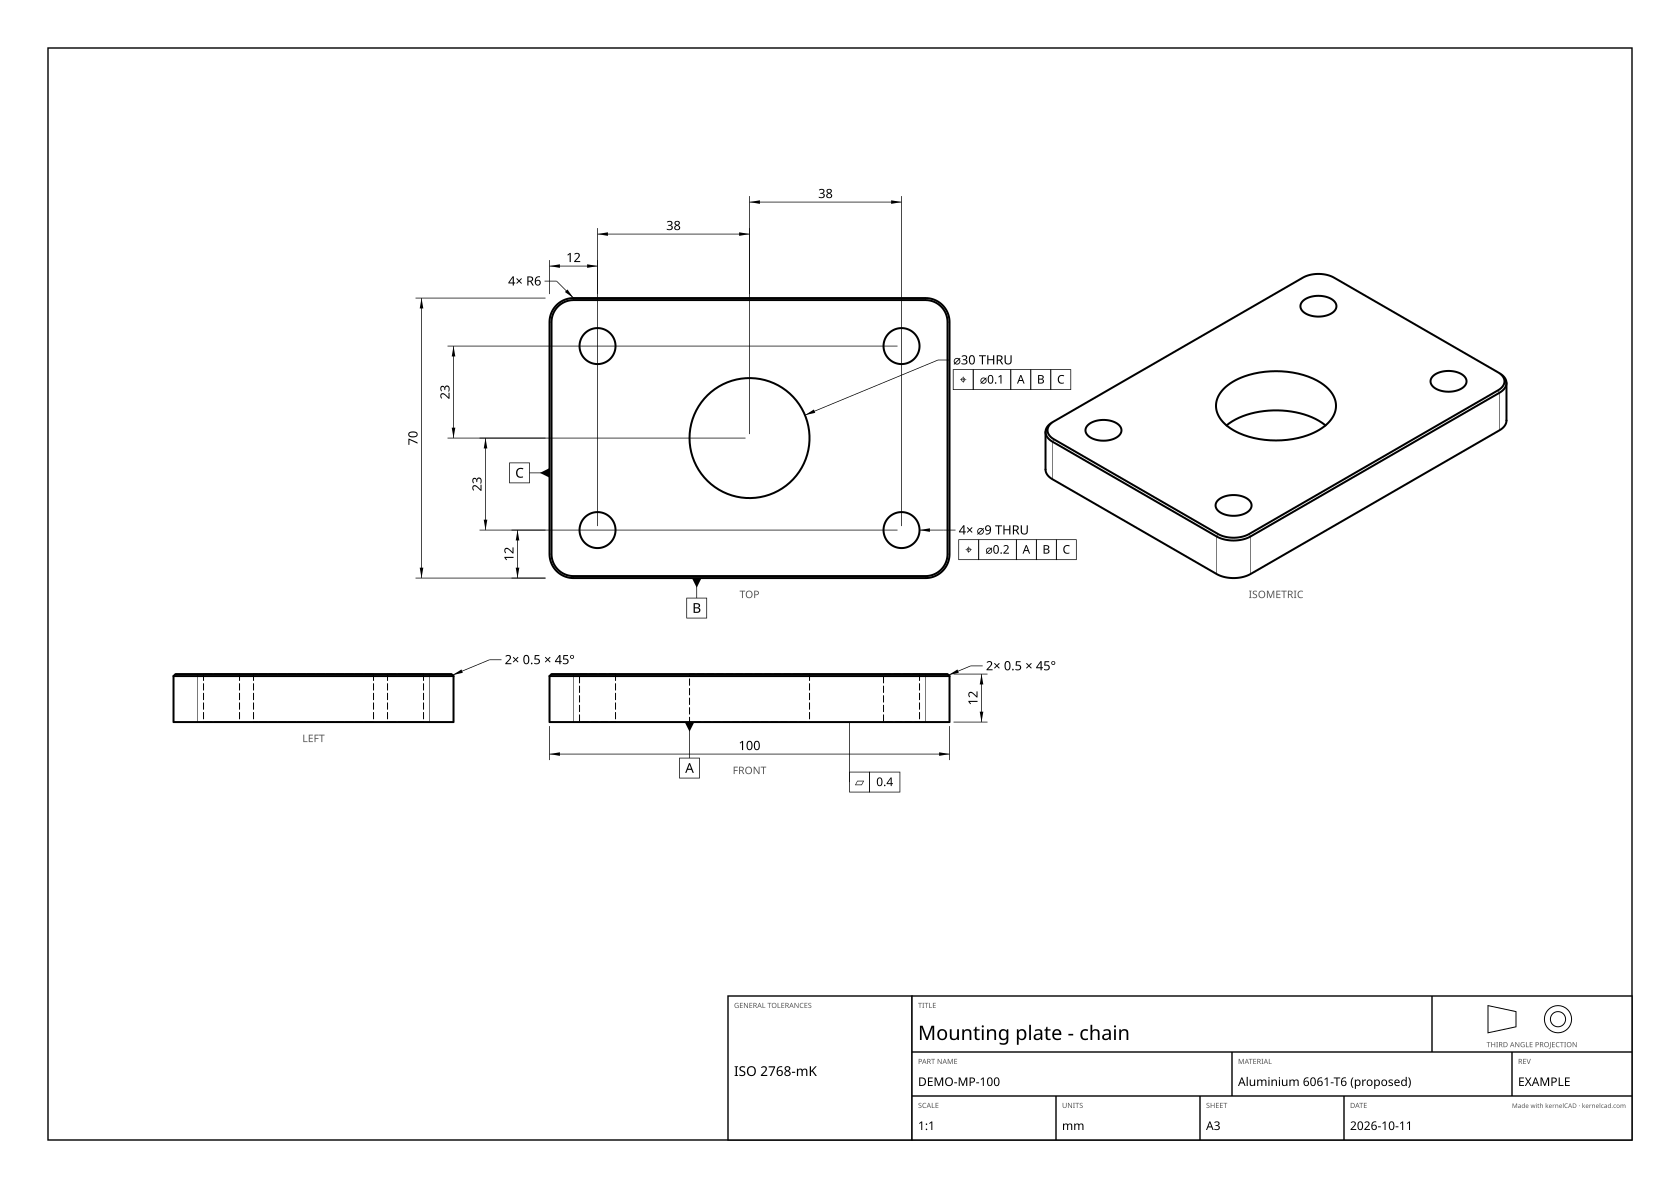
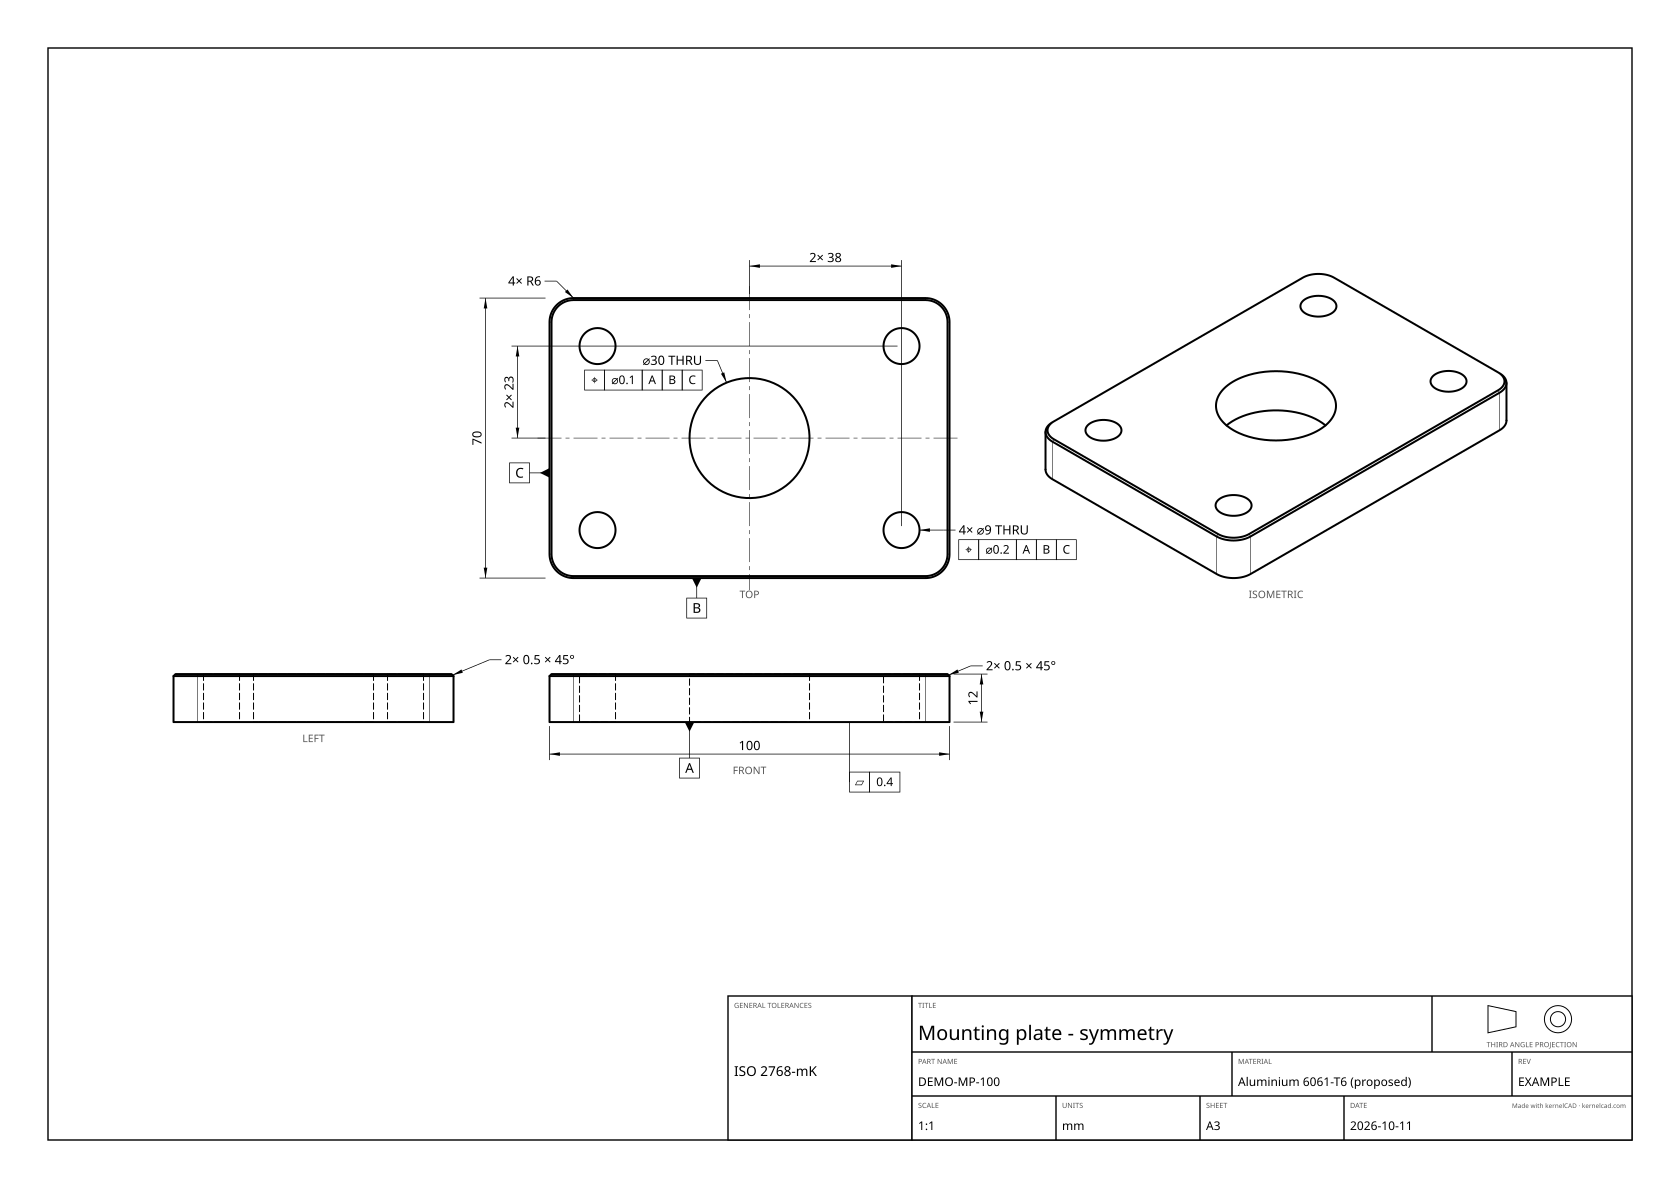
Baseline PDF · Chain PDF · Symmetry PDF
3. Tidy up a callout
Click a label in Annotations. Edit Annotation text, use Extra offset (sheet mm) to give it more room, or tick Hide annotation. Click Refresh preview to see the change.
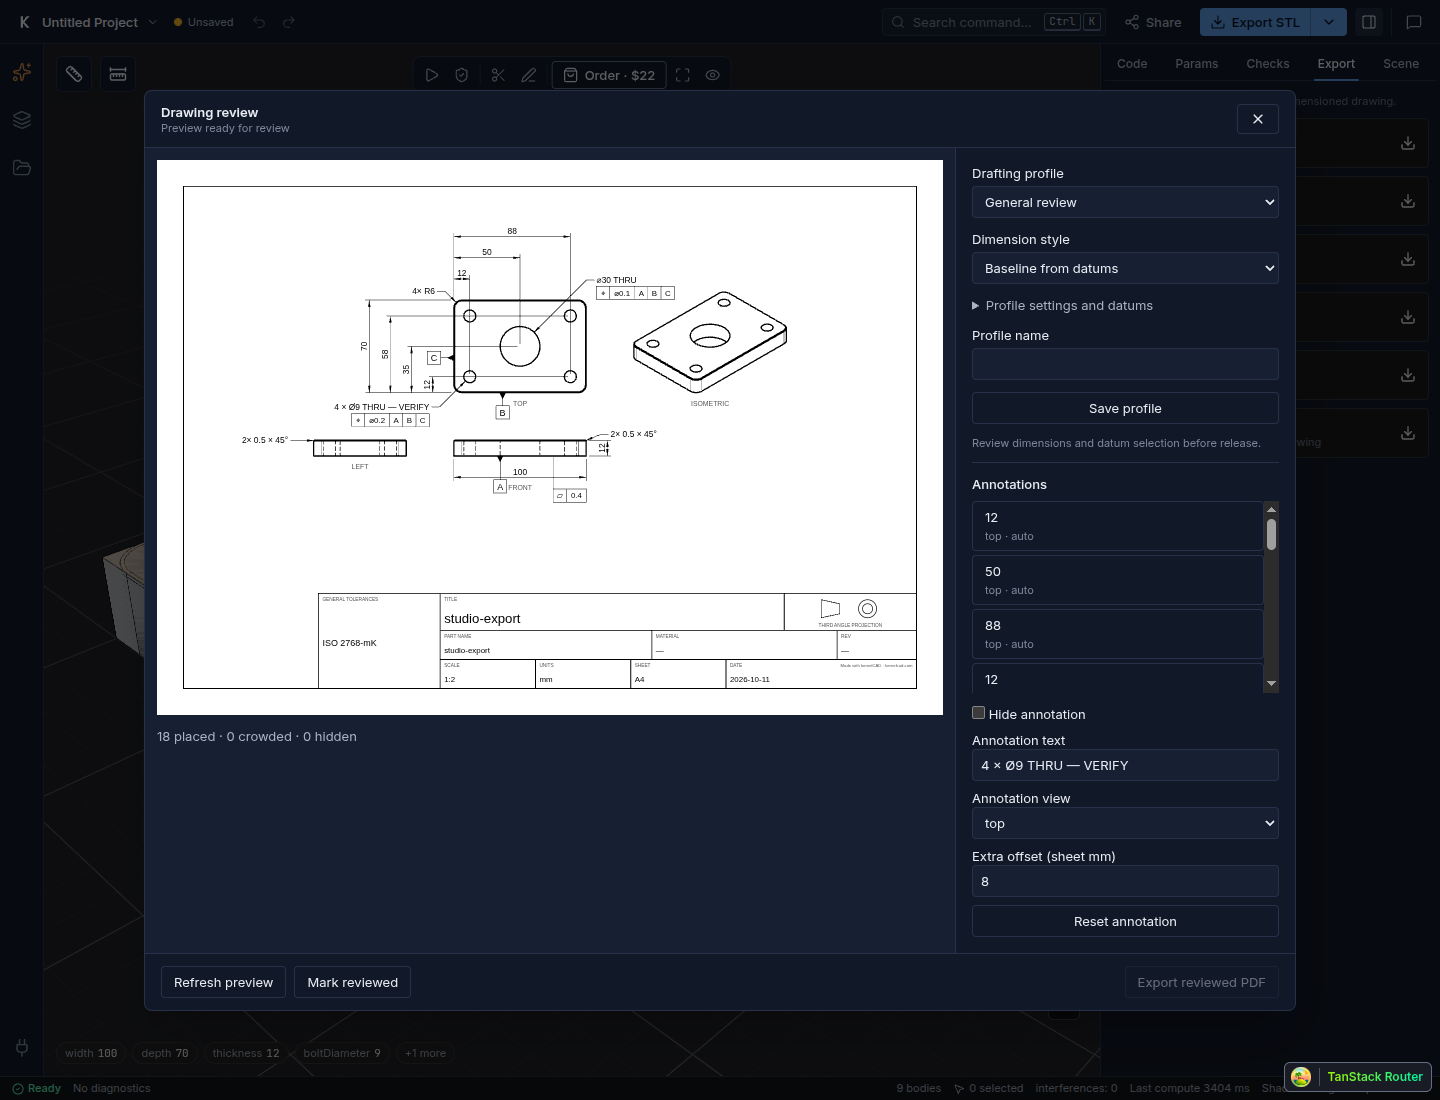
4. Download
Check the sheet, click Mark reviewed, then Export reviewed PDF. If you change the part or drawing settings, review the new preview again.
Want the same paper size and style next time? Enter a Profile name and click Save profile.
Watch the Studio walkthrough. The video and Studio screenshots show a local walkthrough. These example parts have not been manufactured or tested.